Monday, August 15, 2016

There Is Power In The Avery Label Add-on In Google Docs!

It's almost time for the annual migration of teachers back to the clean hallways of their schools. If you are like me, you make plans to be more organized in some way at the beginning of each year.  One great tool for organizing the room and saving time later in the year is the use of Avery Labels. Google Apps does a great deal for creating and sharing data and it is also the secret to making Avery Labels even more powerful.

The video below walks through the process of using a Google Sheet to hold student information and using that sheet with Google Docs to create the labels.  This is a free tool and you can use it over throughout the year.

bit.ly/aisdaverylabel

Teachers will quickly see the utility of the Avery Label Add-on for Google Docs.  Make labels for desks, wearable name tags, class lists, Science Fair poster labels, the last-minute field trip name tags and more! 

Students also have access to this same tool. Students could create math facts in a spreadsheet and print out their own flash cards or create study cards for projects.

How do you use labels in your classroom to better organize the learning environment? Please share below in the comments.


Friday, April 29, 2016

Powerful Search Inside the Google Photos App

I love taking pictures, but that translates easily to the idea that I have a ton of photos. I'm taking advantage of my unlimited storage available in our Google Apps For Education's Google Drive and have the app setup so that my photos from my mobile device will automatically upload into my Google Drive, just to see how well this feature works.  I was headed for a big surprise!

I was working with a teacher and the subject came to braiding hair. Being the 21st Century daddy I am, I had to show off my first attempt at French Braiding my daughter's hair.  Problem: I have tons of photos on my phone and didn't know how long ago I took the picture.  Solution: I remembered I had Google Photos app on my phone.  I used it to search 'braid' and came up with:
Wow! The top two choices were Mancub2's braided hair, selected from all of my photos. It also came up with my friend's pic with her hair in a bun.  

I was intrigued, I started searching other words.  I searched 'license plate' and 'cooking' and came up with the photos below. If Google can find a braid in a picture, a license plate should be no problem. Cooking was a very successful search, but for some reason, Mancub1 and Djude triggered 'license plate'.  


Impressed, I tried to push the envelope. What about searching for something more conceptual? I search 'war' and the World War 2 and Korean War memorials in Washington DC were found.  I understand that the geotagging on the photos probably helped that result.  Also found when searching 'war' were a group of pictures of my dad. One was taken at the Veteran's Hospital and the other at a family gathering.


I was very surprised by how well the photos search works in Google Photos, on my phone as well as my laptop.  Some of it is image recognition and some of it uses geotagged clues. This is an impressive tool available to all Google accounts. 
-Howard J Martin

Monday, March 28, 2016

A Reflection on Student Presentations

I was on one of my campuses and received an invitation to watch student book reports in Ms Cole's second period class. This teacher's team uses technology regularly throughout the week and I was ready to enjoy some good presentations, most-likely slidedecks. 

Sitting in that room, it was quickly clear to me that the students were not just doing slidedecks. For starters, there was a buzz in the room with excited students ready to share. They were at their desks, ready to take notes about the book reports. The teacher began by just stepping back and letting the first student take control of the computer. The green flag was dropped and the students were off!

After only about six student presentations, I witnessed Google Slides, Prezi, MovieMaker, PowerPoint, iMovie, Videoscribe, PowToons, Scratch animations, YouTube and more. Students were citing resources from Pixabay, Wikipedia, Flickr and either making or using copyright-free music in their presentations. Final products were shared on the classroom wiki, from a YouTube link of their movie or on another web-hosted site. 

I was impressed by the products that they created, but walked away with permission to share because of what I heard in conversations. "This is fun watching everybody's presentations. You get to how everybody was creative." Students asked questions about the content and about the technical aspects of the presentation. "Does PowToons have any online tutorials?" one student asked. 

Let's put some light on Ms Cole for a second. Her conversations often included, "How did you do that?" and "I don't know what that is. Could you teach us later?" The classroom was a learning environment where students were free to evaluate and choose the technology that best helped them demonstrate their content. There was a criteria for 'must use technology', but Ms Cole let them use their experience over the year so far and their natural techno-curiosity to become engaged in their learning at an electric level.

The teacher had a large part in getting students to this point. The project requirements included a storyboard of some kind to help plan their product and were held to a firm deadline. Students were asked by their peers, "How long did that take you?" Each student was able to give a good estimate and explanation. "It took me 6 hours one weekend," said one movie maker, "because I was learning new software. Next time it will take me much less time." The teacher regularly posts assignments in her classroom wiki and students started the year by typing work into the wiki or providing links to their Google Apps content. The technology had become a natural extension to the classroom learning process.

There were hindrances. The classroom is not a one-to-one class and has some of the oldest hardware at the school. Students didn't have training on their online tools and had to problem-solve things. (For example, Google Slides won't let you play a song throughout the presentation, so the student played the song in one tab before starting the presentation in a different tab!) Often seen as a huge disadvantage is that she was working with 4th grade students who had to learn to access the district servers and Google products without email or on-campus technology support. Yes, these were 4th graders

The students had become content creators with the encouragement from the teacher. She admits to the students that she is just as much a learner as they are and that the classroom community must learn together and help each other. Ms Cole doesn't claim to be the biggest technology guru in the state, but her students are benefitting from her willingness to try new things and allowing her students the creative opportunities that keep them coming to school enthusiastic about learning. I very much enjoyed these presentations and the student enthusiasm in the room.

What could your next step be to transform your classroom into a more student-centered learning environment? Are you already there? What could you share with peers that could help them in their next steps? 

Wednesday, January 27, 2016

Are you a Chrome Tab-aholic? Consider using OneTab.


Do you frequently have so many tabs open  in Chrome that you are unable to tell what is loaded in each one? 
Are you a user who just can't close a tab because it may be useful later? 
Do you frequent see, Mr "Ah, Snap!"?


You, my friend, have a Chrome tab issue!
There's a solution for you, but the first step to getting the help you need is admitting you have a problem.

I don't have a tab problem!
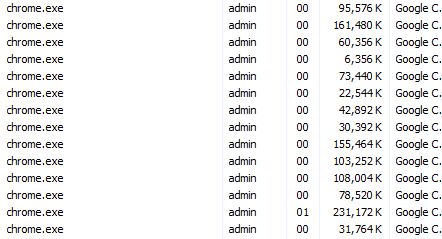
One of the reasons for a visit from Mr "Ah, Snap!" is running out of enough memory (RAM) to keep up with all tabs open in the browser. Each open tab in Chrome consumes memory. After just a ten tabs (I am trying to cut down), I am already using about 1.2 GB of RAM. When doing research, I frequently have well over 20 tabs open. This leaves few resources for other processes the computer needs to do.


Why does this happen?
Chrome trades memory usage for stability. Each open tab, extension and plug-in is run as a separate process. When a tab or plug-in locks up, users rarely have to restart the entire browser. In most cases, just close the tab and try again. This is especially welcome when one has several tabs open.  The downside to this stability is the possibility of using up all the available RAM on tabs leaving little for running other applications.  Suddenly you are in "click and wait" territory.

Is there anything I can do (without changing my browsing habits)?
OneTab is a FREE browser extension for Chrome that can help you manage the tab monkey on your back.
OneTab allows users to convert open tabs to single tab with a list of links that can be restored individually or all at once.  


After clicking the OneTab icon, my ten tabs were condensed into one tab of links. I am now using under 330 MB.  Below shows my one tab, my 5 extensions and my browser itself.


 I can quickly relaunch any or all of the tabs I was using, and my computer has more RAM available to run other programs I need. OneTab even allows the import, export and sharing of tab links.

If you find yourself with a slow computer when you have many tabs open, give OneTab a try.

Wednesday, January 20, 2016

Formative Assessment Tool Reviews

We've been talking about Kahoot in the district for a couple of years now.  As always happens, one company's success leads others to new innovations.  This review will look briefly at three great alternatives for collecting data from students in the classroom.

First off, let's cover the similarities of all three.  All three are free websites that are designed with teachers in mind.  They all utilize gamification to engage students in giving feedback in a fun and competitive environment. The teachers can create their quizzes online, save them and reuse them as needed.  All three also have a searchable database of free quizzes you can use with your own students.   The ease of working with all three on any computer or mobile device makes all three an attractive choice. Lastly, all of them will let you collect, view online and save student answer data.


Kahoot.it 
Kahoot has been the trend setter.  The students just see the four answer icons on their screen when a teacher presents the quiz from her computer. All questions are timed and students must read the answer choices from the teacher's projected screen.   Some teachers like Kahoot because of the simplicity of quiz setup and that spontaneous quizzes can be setup very quickly.


Quizizz.com and Quizalize.com
Unlike Kahoot, Quizizz and Quizalize both provide the question and answer choices on the student device.  Students can work at their own pace, question order randomized and the timer turned off.  A huge bonus of both is the ability to present the quiz as homework.  Students can take the quiz code home with them and complete it one or more times anytime during the quiz's assigned window.

In addition, Quizalize provides the teacher with more text space for longer questions and answers, a math equation editor, the possibility of student logins and class groups.  The teacher also has the ability to type an answer explanation for when the student chooses unwisely.

A teacher really can't go wrong with any one of the three sites. Students enjoy the interactivity and game time and teachers get data to help refine instructional time.

Leave a comment below about your favorite.  Do you have a favorite quiz you could share below with other teachers?

Monday, January 11, 2016

Google Maps and Google Sheets Make Interactive Maps

Trevor Beck published a great video that shows how students can use a Google Sheet of data and import it into Google Maps to make an interactive map.  The video is pretty easy to understand and follow!

How can teachers use this?  

  • In a world history class, combine economic data with geographic tags on the map for easier comparison between locations.
  • Use the Layers to provide hideable data. Have one layer for German troop movement and another for Allied troop movement.  Spreadsheet data could provide dates of military action and casualty statistics. 
  • Historical data regarding climate change could be collected in a spreadsheet which could be imported into the map. Layers could provide points for specific decades.
  • Record biographical information for people important in Texas history.  Import the data into a Google map that shows where these people lived in Texas.
  • Similar to Google LitTrips, connect fictional events in a historical fiction story to their real geographic locations.  Edit the tags to include student-made art that illustrates the events.
What are some other ways that you could combine spreadsheets and Google Maps in your classroom? Please share in the comments below!

Wednesday, December 16, 2015

Combining Documents into a Single PDF using Acrobat Pro

We often get questions about how to combine documents into a single PDF using Acrobat Professional. Challenge accepted...


Sunday, November 22, 2015

Holiday Activities via Google Classroom

Happy Thanksgiving week!  The Instructional Technology Team is very thankful for the teachers in AISD that continue to transform their instructional practice and develop authentic ways to engage students using the available technology in the classroom!

Holiday Activities via Google Classroom!
In an effort to demonstrate Google Classroom to teachers and students, The “Holiday Classroom!” class is being shared with all teachers and students in AISD.  Simply joining the class will provide teachers and student access to a few Google Apps activities created for the holiday season. Students will automagically get their own copy of the activities after joining the class.

(*Teachers, see important note below.)

Students and teachers can go into the AISD Cloud and search for Google Classroom. Once open, click the + sign at the top right to select Join.   Join this class using the code, “5adyiv.  Students can immediately begin working on any activity in this Holiday Classroom! by just clicking on the assignment title and then on the activity. 

The process of joining will create a copy of all activities in a new folder in your Google Drive called “Classroom”. Inside that folder you will see all classes that you have joined, including “Holiday Classroom!”  

*Important: A quick-start guide to using Google Classroom can be found at: http://bit.ly/aisdgclassroom .  Also, it is important that teachers first click the blue “Teacher” button the very first time they access Google Classroom.  They can then +Join a class just like a student.  

One of the activities included is a Thanksgiving-themed "What I Am Thankful For" Google Slide. Simply adding text to this slide completes the activity, but students can explore other tools within Slides as they become more familiar with this creation tool.  Check out the activity at: http://bit.ly/thanksgivingslide .

Leave a comment or feedback on these activities or implementation strategies that you found helpful.  We would love to share your feedback with other teachers. 

Monday, November 16, 2015

Make a Google Doc Open As a Copy?

When sharing a Google Doc via URL, you can make a change to the URL which will make the student create a copy of the Doc automagically.  All it takes is a simple edit at the end of the URL.

For example, I have a 8 Page Booklet foldable template that I want my students to use.  I have shared it with the world using the following URL:
https://docs.google.com/presentation/d/1PdA_wyw2FCtOOmYUBog8bzPSC0GGyFxLrz0L-SjNi_k/edit?usp=sharing

If that link is in an email or on a webpage that they have access to, they can simply click the link and be able to view this template. The students will then need to File/Make a copy to use it for an assignment.

Now, I can save my students a couple of steps, which can be valuable in many classrooms, and give them a link that will automagically open up to the Google "Make a copy" dialog box.  When the students click "Make a copy", Google will place a copy (that the student now owns) into the students' Google Drive.
To do this, you need only edit the URL that you are sharing with the students.  Copy the URL above and delete everything at the end, starting with "/edit?....".   Replace it all with "/copy" and then share that new edited URL.

https://docs.google.com/presentation/d/1PdA_wyw2FCtOOmYUBog8bzPSC0GGyFxLrz0L-SjNi_k/edit?usp=sharing  becomes:
https://docs.google.com/presentation/d/1PdA_wyw2FCtOOmYUBog8bzPSC0GGyFxLrz0L-SjNi_k/copy  .  That's it.

So, if you are not using Google Classroom to distribute templates to students, sharing Docs with this Copy tweak may just be the small time-saver that makes a difference in your day.

Tuesday, November 10, 2015

Hiding desktop icons on a Windows PC

Many users store current projects to their desktop for quick access. This can create distraction for audiences when presenting. Windows has a quick way to hide icons to present with a clear desktop.

Right click on an empty space on the desktop
Highlight view
Slide over and down to Show desktop icons
Toggle Show desktop icons off
Repeat the process to show the icons


Friday, October 9, 2015

ViewPure - YouTube without the distraction

YouTube is a great resource for educational content. It is also a source for, shall we say, off-topic content. Often the great educational content shares the screen with a "related" video that grabs our students' attention like a flashing sign advertising free ice cream. Sometimes there are also comments posted by people demonstrating their command of the English dialect my grandmother called "sailor talk".


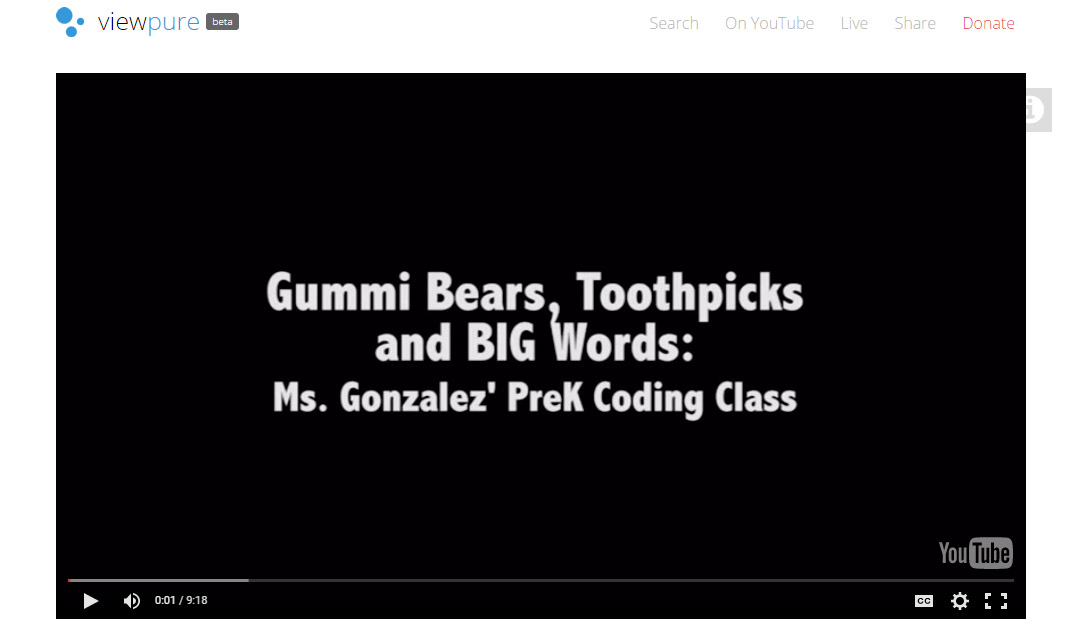
 ViewPure is a free web service that allows you to watch and project YouTube videos without seeing potentially distracting "related" videos or comments sections. Simply paste the address of the Youtube video you wish to isolate and click the Purify button.

The video is then displayed in a clean browser window free of related videos and comments section. Because there is less clutter on the page, the video gets much more screen real estate.

ViewPure also creates a reusable URL and allows for creation of a custom URL with a password. Just click on the gear icon after pasting in your YouTube video address and adjust the settings.


Too many steps? Don't want to have to remember to copy and paste? Want a quick and easy way to use ViewPure from your browser? You are in luck. 

ViewPure has a shortcut that can be added to the browser bookmark bar that will automagically open the YouTube video in the browser window in the clean ViewPure format.

If you would like additional information on using web video with your classes, please contact your Instructional Technology Specialist.


Thursday, October 8, 2015

Safely Using Images From The Internet

Probably one of the biggest problems with students using the internet for school work is the inappropriate or illegal use of images found online.  Teachers like to think that Educational Fair Use means that anything can be used with students.  Not so.

(Click to enlarge)
A teacher in my PLN (Professional Learning Network) shared the picture below.  A teacher in her district found a picture in a Google search and copied it from the search results page and used it in a presentation. That presentation file was uploaded for a few days on her website for students to use and then taken down.   The company, a part of Getty Images apparently, has tools actively searching the internet for their work and they found their image.  The teacher was sent a bill for $1480 for the use of the image online.  Legally, it had to be paid.

Researching into this more, there are a good number of educational institutions sharing that they have been hit with similar bills.  The teachers that posted the images online are responsible for paying the bill, often in the thousands of dollars.

Looking for an authentic object lesson for students or teachers about copyright and the use of images found on the internet?  This is pretty authentic.

Where Do I Get Online Images For The Classroom?

Not everything on the internet is evil or copyrighted.  Students have access to a wealth of images that can be used for reports.  Do keep in mind that the practice of citing your image source for each image can help the writer be mindful of copyright permissions for images used.

Google Image Search
There is a lot in The Google that is legally useable. Go ahead and use the Google image search, but change the settings to only search for images that have been labeled for reuse or reuse with modification.

Again, these photos belong to somebody. They are just letting you use them for free if you give them credit with a citation.

Flickr Creative Commons
Flickr.com maintains a Creative Commons (https://www.flickr.com/creativecommons/ ) that houses millions of photos that are free to use.  This page quickly describes the Creative Commons licenses and groups the photos by license.  Not all of the photos are elementary safe, but teachers can collect some great images and provide them as a photo bank for classroom projects. Look for the Attribution icon for freely-usable images.

Google Docs Research Tool
One of our favorite tools in Google Docs, the Research tool is found in the Tools menu in Docs and Slides. (Google support).  Using this tool, students can search for images, websites, statistics and more right beside the Google Doc they are working on.

Finding an image is as easy as typing your search term at the top and clicking the 'G' to give you access to the Images search.  You can now find a good image in the results and simply drag over to your document.  I love showing this to teachers in a large room, just because you quickly hear gasps of joy as they realize that the Research tool automatically creates a footnote for that image and places the citation at the bottom of the page.  No rolling the typewriter up from the bottom of the page anymore.

Images, websites, quotes and more can provide a clickable citation for your document.


More Online Resources For Free Images For The Classroom
Our friends at Harvard Law School Library have published a guide for appropriate use of online images. Finding Public Domain and Creative Commons Media. They share a few more resources and legal definitions for public domain images.

What are some sources that you use with your students?

Wednesday, October 7, 2015

Google Chrome browser setting - On Startup > Continue where you left off

I knew this feature existed but never realized how useful it could be.

Note: You must sign into the Chrome browser to make the best use of this feature. (more info)

Chrome will remember your tabs when you last closed it and reload them when you next launch.
I frequently collaborate with my colleagues. That usually results in several tabs getting opened in my browser. Then my calendar reminder tells me I am due for another appointment in 15 minutes. I leave the meeting, close my device, and lose my tabs.

With Chrome's "Continue where you left off" setting, my tabs follow me in Chrome across platforms – from Chromebook to office desktop to Apple laptop to home desktop.
I do not have to perpetually and use the same device to keep my tabs. Pretty sweet.

Click on the settings button (at top right of the browser)
Again, this feature only works if you are signed into the Chrome browser.

A downside is Chrome takes a little bit longer to load if I have many tabs open in my browser. My workaround for this delay is simple.  I use the OneTab extension before closing so I have a list of the tabs I had open before I closed.


Give it a try. You can always change it back if you don't like the experience.

Thursday, October 1, 2015

Publish Google Docs as a Webpage

Sending a letter home to parents has come a long way since the mimeographed letters that turned many a teacher's finger dark blue.  The increased use of Google Docs in our classrooms means that some teachers are finding good reasons to send Google-created docs home to parents. 

The issue starts to become, "I don't want parents to login to anything to see my Google Doc." One way around this question is to publish the Google Doc as an HTML website.   The document retains all of the content but is displayed on a web page by itself for any web browser to view. 


Any Google Doc can be published to the web.   Open the document and select "File/Publish to the web... ".


By default, the document will be visible to anyone on the internet.  Click Publish and then OK to complete the process. 


Once published, you will be given the URL that you can share as is (or shorten with goo.gl, bit.ly or some other shortener).


You can stop publishing the doc at any time using the "Published content & settings" drop menu and clicking "Stop publishing".


There are a number of other ways to publish information or send it to parents, but the Publish to the web option can quickly share your Google Docs with anybody without requiring a login or Google account.


Friday, September 18, 2015

EasyBib - A bibliography generator and great chrome extension

First off, let's make perfectly clear that this is not fair. I had to type citations for papers by hand, in the snow, by candle light, uphill both ways and usually on this ancient torture instrument called a "typewriter" (ask your grandparents). My works cited pages frequently looked like a 3D relief map from all the correction fluid build up on the surface. For you youngsters, "correction fluid" was the backspace key and spelling correction of the early 1980s. Imagine painting over your mistakes so you could make more mistakes on top of your previous mistakes. Also imagine that "paint" flaking off if you folded the paper. I can only imagine the challenge my teachers faced trying to make sense of  my papers (content aside). I do know my grades sometimes did not reflect a positive reception to my work.

Youngsters today ("Get out of my yard!") have it easy.
A great extension for Chrome called EasyBib Tools makes creating bibliography entries quick and easy.
If you want the extension to "follow" you in Chrome on other computers/Chromebooks, be sure you are logged into your Chrome browser. Click here to see how. This is not required but highly recommended.

Follow this link to get EasyBib Tools form the Chrome Web Store. Click the top right button to "+ ADD TO CHROME".
An orange book icon for the extension will show up at the top right side of your Chrome browser. When on a webpage you wish to cite, click on the orange EasyBib icon then click "Cite on EasyBib". There is no need to register to get MLA citations.

A window will pop up providing some options to edit the citation. 


Once edits (if any) are complete, click the Create Citation button. A Success! notice will appear with a link to view your bibliography.


Click the link and the citation can be viewed.

But wait, that's not all! 

The export feature allows the citation page to be downloaded as an MS Word document, saved to Google Docs, Dropbox or OneDrive, emailed or copied for pasting.

What did I say? Totally unfair.
Now excuse me, I have to tell the neighbors to turn down their "music".

If you would like more information on Chrome extensions or Google Drive, please contact your Instructional Technology Specialist.

EasyBid Chrome Extension - free to install
MLA format is free. 
APA, Chicago and a plethora of additional formats are available for $19.99 yearly or $39.99 for life.


Manage The Saving of iOS Products With Multiple Users In The Classroom

Our previous post demonstrated how to upload items in the iPad's Photo Roll into the user's Google Drive.  This works great for the single-user iPad, but presents workflow issues for the shared classroom iPad.  Students would need to learn a classroom procedure for using multiple Google Drive accounts on the iPad. This post presents one possible solution.

Teachers have been known to login on a classroom device with their own teacher credentials so that students can use the greater teacher privileges or the teacher's personal accounts.  This is not recommended for various reasons, the main one being that all AISD staff and student have accepted the Acceptable Use Policy that prohibits the sharing of one's username and password.

One possible alternative solution could involve using a classroom Google ID setup by the teacher using a personal Gmail account and not a school district account.

Setting Up Google
The teacher can login to the Google Drive app on the classroom iPad using a non-district Gmail account different from their own personal Gmail account. Do not share the password for that account with students. Do not let students create new Google Apps documents on the iPad using this account.

From your AISD Google Drive, create a folder that you will use with students. Your AISD Google ID will retain all ownership of the folder.  Share that folder with your new non-AISD Google ID. You can now login to Google drive on the iPad using your new Google ID and you should see anything that is saved into that folder.

Now, using your computer, make this folder accessible to your students by sharing it with them from your AISD Google ID. Only your AISD Google ID will be able to share with the student Google IDs. You can share it with each student specifically or use the @crs.austinisd.org group ID for your students. *Ask Instructional Technology more about that.


Sharing From iOS Devices
Students can use any creative app that will allow them to save their product to the Camera Roll on the device.  Save images created in Skitch, PDF copies of comics from Comic Maker, videos from PhotoSpeak, ChatterKid and others directly into the Camera Roll of the device.


Once they have a product in the Camera Roll, the students can open Google Drive. (The teacher already logged into the new Google ID created for the class.) The students will see the My Drive of the Google account.  Clicking the red + circle will provide the Upload option we need.


 After clicking Upload, the red circle will provide access to your Camera Roll in Photos and Videos.


Select Camera Roll to find your recently created items. Select what you want to upload and touch the checkmark at the top right.  The item(s) will be uploaded into your Google Drive account.


Organize The Google Drive Folder
One additional nice touch is to train the students how to organize the items that they upload into the class folder.  The teacher could create a folder for each student within the shared folder.  Once a student uploads an item into Google Drive on the iPad, they can touch the 'i' icon on their product, click Move in the info window, and then select their named-folder to have the product moved into that folder. 


This is just one option for quickly getting items off of an iPad and available to students and teachers from any computer. 

What other ways do you find effective in transferring iOS products from the iPad to your computer? Is it a free or paid app?  Does it work on the AISD Wifi network?


Wednesday, September 16, 2015

Sharing iOS Products With Your Google Drive

A classroom iPad is a very creative device. Students can independently create products like comics, images and videos.  The often-asked question is, "How do I get their work from the iPad to my computer?" Sharing this work is not difficult and one solution uses your Google Drive account.

The video below (hosted by AISD's MyTraining in the AISD Cloud) demonstrates how one can get products from an iOS device and save into the user's Google Drive.  


This method does require the user to login to their Google Drive and only one Google Drive can be logged into at a time. For the shared classroom iPad, the teacher will need to establish procedures for the students to follow to effectively save to their Google Drive.   A future blog post here will demonstrate a very workable solution for multiple users saving to Google Drive.

Alternatives would include using DropBox, Box or other cloud storage services.  Sometimes, the free storage service limits your monthly uploading bandwidth, but Google Drive will not.  What alternatives have you used effectively?  Share your experiences in the comments below!

Thursday, September 10, 2015

Makers Wanted! Intel's American's Greatest Maker

Makers Wanted!

Do you want to be a star of a television series? Do you think you got what it takes to build the next amazing device? How could you impact education with a Million Dollars?

Apply to be American's Greatest Maker Intel Presents America's Greatest Maker.

America's Greatest Makers Challenge Intel, in collaboration with Mark Burnett, United Artists Media Group and Turner Broadcasting System are teaming up to bring a national Makers' Challenge to television. Students are encouraged to submit ideas for either wearable technologies or smart connected consumer devices powered by Intel® Curie™, a button-sized computer. Intel engineers will help bring the ideas to life and may be featured on a television show airing in 2016. 

Deadline: October 2, 2015 Award Amount: $1,000,000 grand prize Eligibility: All entrants must be legal residents of the U.S., 15 years of age or older 

How to Apply: The application process is conducted online via the America’s Greatest Makers website at www.AmericasGreatestMakers.com. Applications can be submitted directly using the application link or sent via email to americasgreatestmakers@gmail.com. 


The following information will be requested: 1. Project Description: A detailed description of the concept, including the motivation and inspiration behind the idea, market need and how the idea will benefit the public. 2. Image/Optional Video Submission: Applicants are required to upload an image that accurately represents their team or product. Individuals/Teams may also submit a video pitch that tells the story behind the idea and why they want to be a part of the challenge. 3. Team Size: Each team is limited to four core members or fewer. 

Monday, August 31, 2015

Video: The Writing Process using Google Drive

Writing is an incredibly important and marketable skill. The process of teaching and learning writing has traditionally required the use of copious amounts of paper. With Google Drive, writing can be a near paperless activity.


Monday, August 17, 2015

Kidblog moving to a pay only model - consider Blogger

The once "kind of free" Kidblog is moving to a pay only model in September.

From the kidblog pricing page:
Beginning September 2015, free trials are active for 30 days - upgrade for unlimited access

Another free service bites the dust. The service will now cost $29 per teacher per year. This is not a huge amount but with district, campus and personal budgets stretched thin, every additional expense seems daunting.

There are other options available. Austin ISD is a Google Apps For Education (GAFE) district. GAFE provides an array of tools for staff and students to use including Blogger. If you are considering student blogs for your classroom, consider Blogger. 
Students already have accounts they can access through Google Drive.

From the AISD Cloud, launch Google Drive.
Once Google Drive has loaded, open a new tab and type blogger.com.

There are ways to set your blog to private.
In your blog settings, set both privacy options to No.
Reader access can also be restricted. 
Also is settings, the blog can be set to only allows authors to read or allow all those added.
Using group lists, such as campusname.students@grp.austinisd.org, can make the process quick.


Instructional Technology would enjoy the opportunity to help you get up to speed with Blogger.